Important News
Print-Ready File Creation: Overview
At Printioutloud.com, we want your printing experience to be fast, easy and affordable. An important step in this process is for you to submit your art files as Print-Ready PDFs. To help you achieve this, we provide as much information about file preparation as possible. The price and time estimates provided to you may be affected if time must be spent correcting file errors. The best way to avoid this is to start the project off on the right foot by ensuring the design file is set up correctly from the very beginning. The main aspects that must be checked and prepared for are:
Bleeds
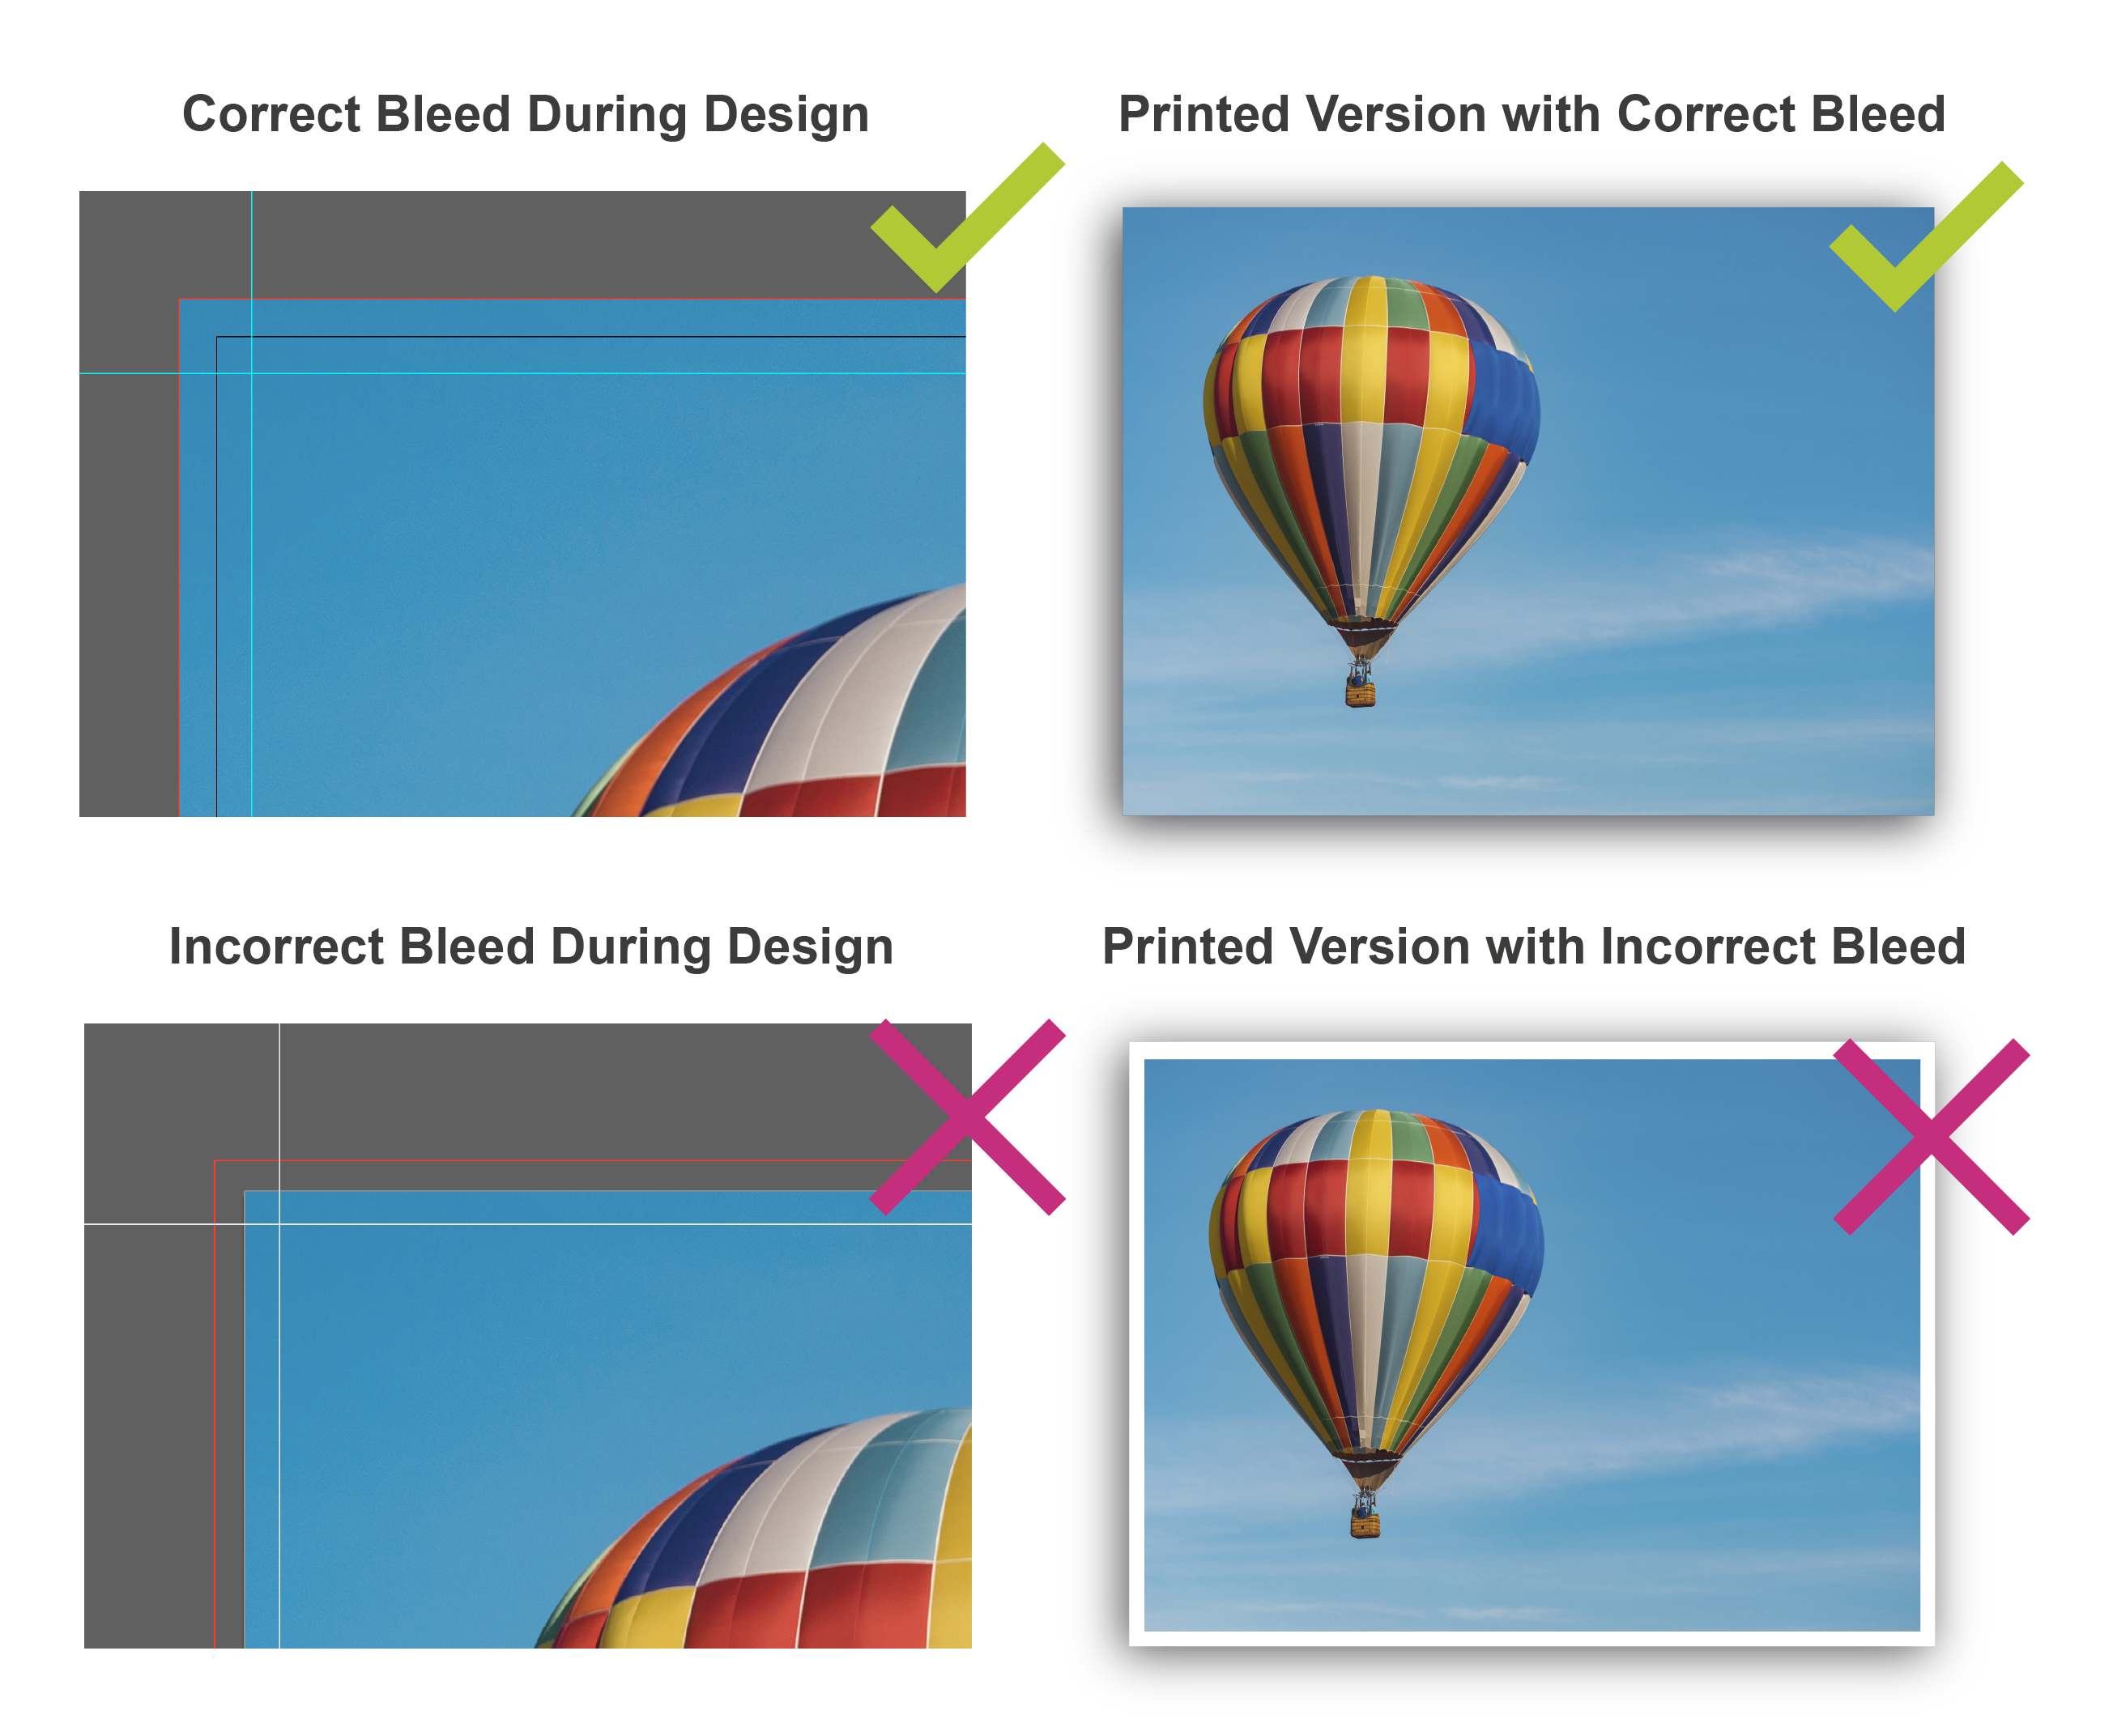
To prevent your printed product from having unsightly white lines around the border, you must set your document up with bleeds. Bleed refers to an extra 1/8" of image that extends beyond the trim area of your printing piece. The project is printed on an oversized sheet that is cut down to size with the appearance that the image is “bleeding” off the edge of the paper.
It is best practice to set up your bleeds at the very beginning of your project so you don’t have to adjust at the end.
A few terms you must understand along with bleed are trim line, safety, and borders. Please refer to the graphic below for further explanation.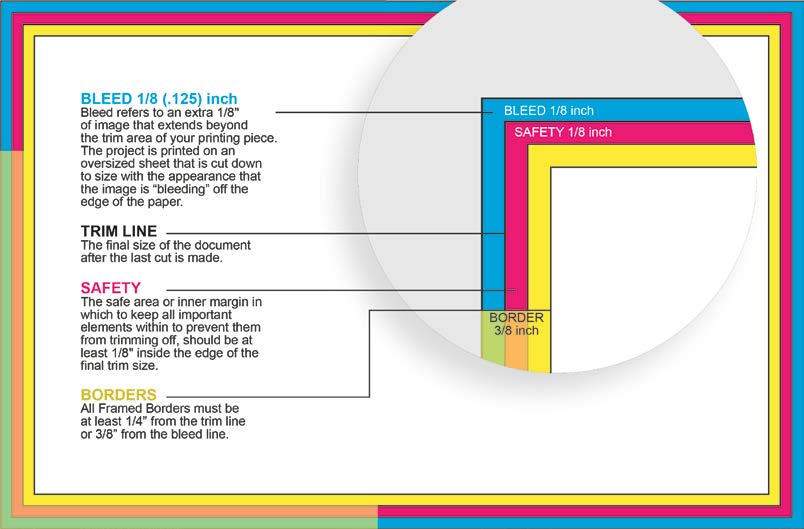
Resolution
PrintingCenterUSA recommends that the file and/or image resolution should be set at 300 dpi to ensure that the final document is not pixelated (fuzzy) when printed. However, some customers find 180 dpi (or better) to be an acceptable resolution. You must closely review the resolution during the proofing process to determine if there are any issues.
Enlarging an image will lower the resolution while reducing an image will increase the resolution. Enlarging an image in a layout is NOT recommended. Images that are less than 300 dpi could reproduce poorly looking fuzzy or pixelated.
Images from the internet are not recommended, as most images are only 72 dpi.
An unfavorable image cannot be resaved as a different type of file. For example, you cannot place a gif file in Photoshop and resave it as an EPS file. This does not change the compatibility of the file. If you have to use low-resolution images we will print only after you consent to the quality.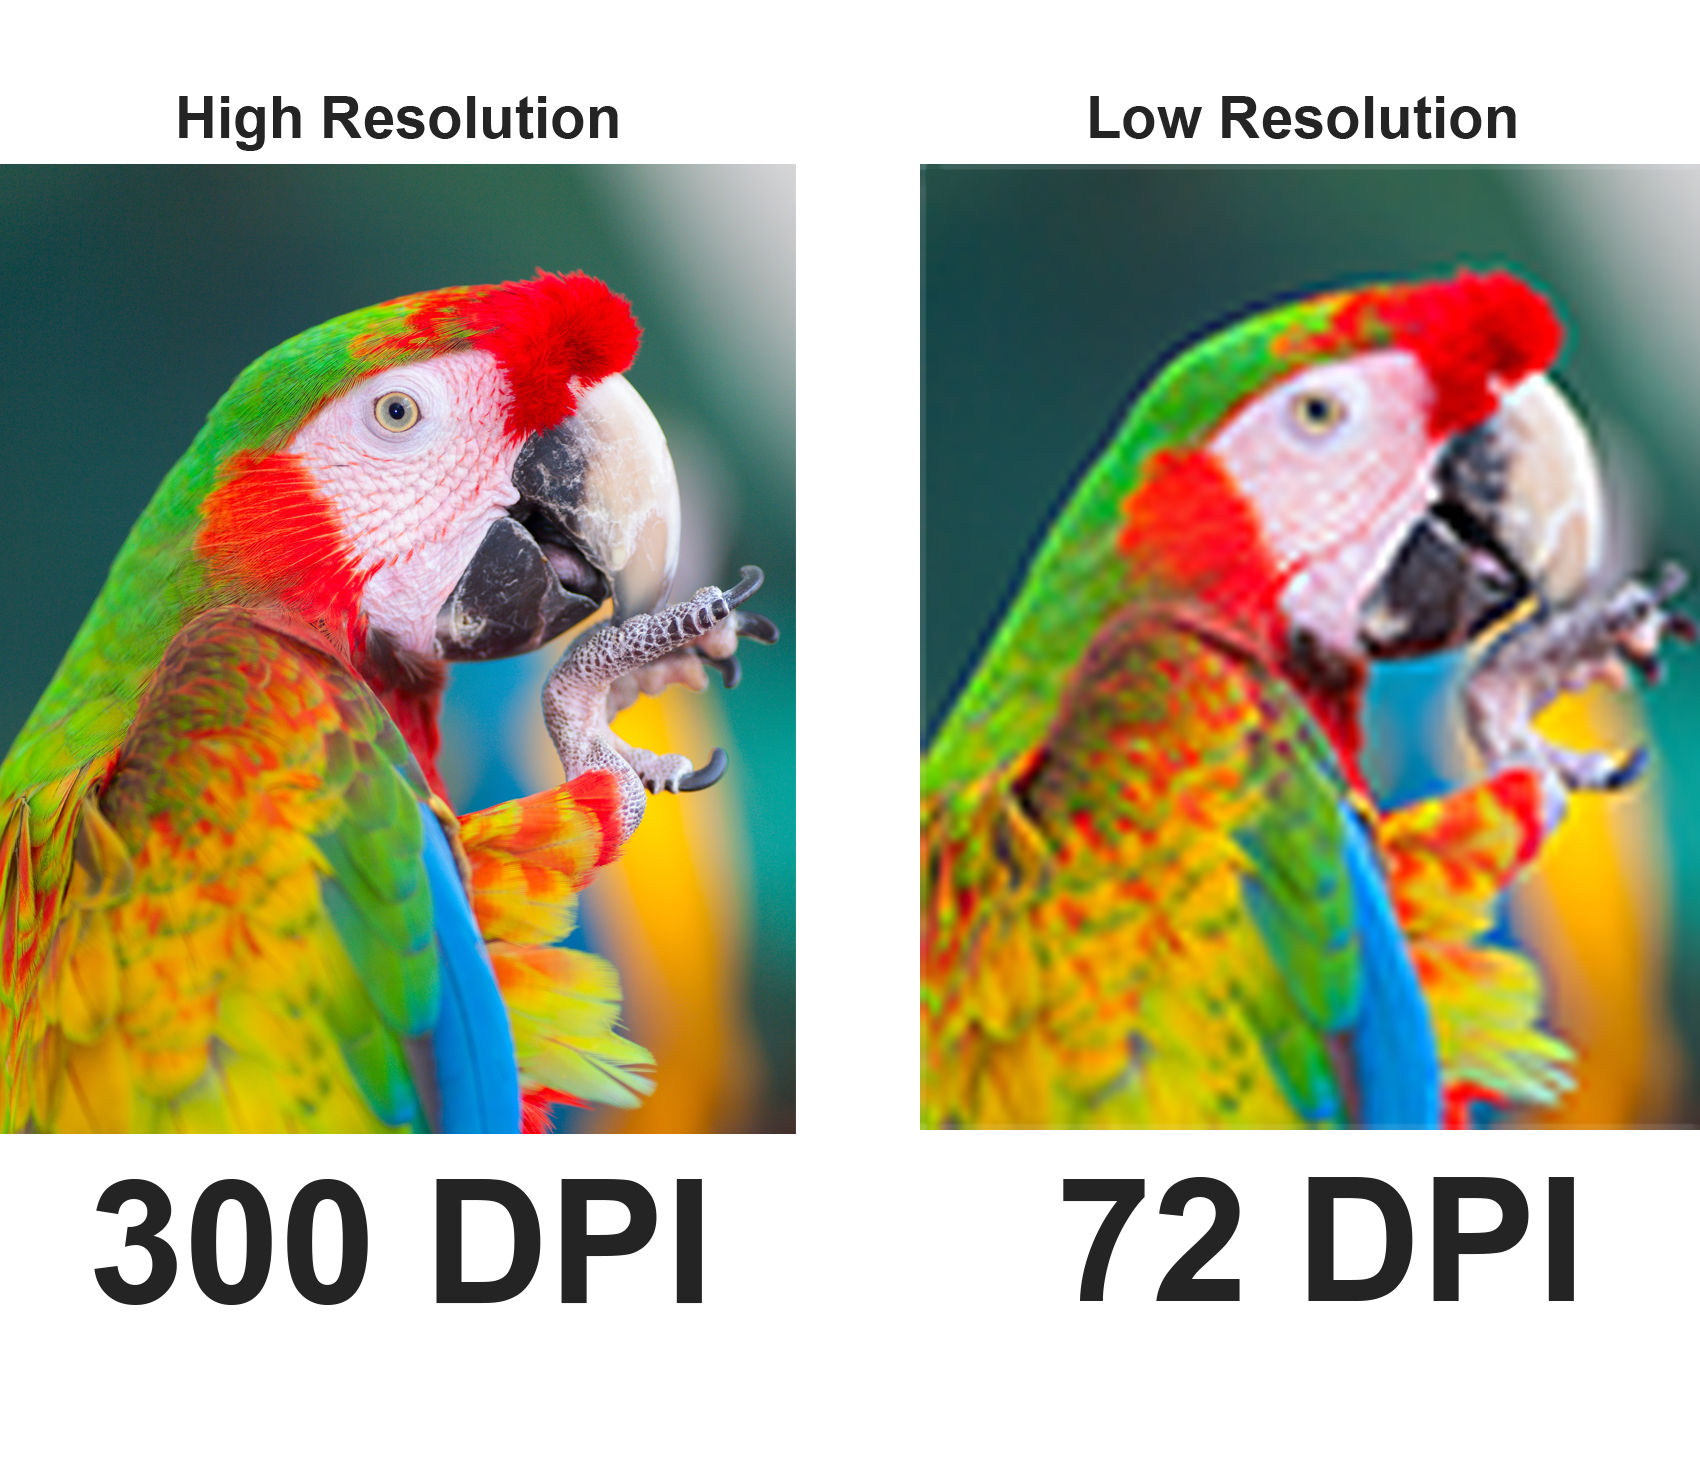
What is plain black vs rich black?
Rich Black only comes up in the context of print design because black always look, well, black on your computer screen. Unfortunately, that’s not the case on paper; at least, not for backgrounds or filled objects/elements, such as a box for text, etc. In those instances, you want to go with the rich option to avoid an unsightly grey in ink. Rich black uses the following CMYK percentages:
C: 60%; M: 40%; Y: 40%; K:100%
As opposed to plain black, which you should use for ALL BLACK TEXT:
C: 0%; M: 0%; Y: 0%; K: 100%
The reason being, you might run into trouble due to the mixture of colors contained in rich black. The extra Cyan, Magenta, and Yellow means unnecessary ink, which may result in blurry or fuzzy type. You want crisp, clear typography with no offsetting. Here’s a handy graphic to illustrate the difference for you:
*Products that are printed with large format dye-sublimation (9oz Premium Polyester Banner, Flags, Table Covers, Fabric Tube Displays, etc.)
call for the following color values: C 100 M 100 Y 100 K 100
C0, M0, Y0, K100 will usually result in a very dark gray, but not a rich black. We commonly see the default black in Adobe Photoshop used instead of our recommended rich black build. The issue with using C75, M68, Y67, K90 is that it will not print a true rich black. That configuration is the result of converting true black in RGB to CMYK. The print result will generally be muddy due to the oversaturated color build.
Where you do not want to use a rich black is in small black text. Because the 4 primary print colors have to be registered or aligned when printing, a rich black build of fine type or text will show the tiniest misregistration on the printmaking the text not appear crisp and sharp.
Page Count
We require that any booklet files be sent as single pages, not spreads. In the files, page 1 should be the front cover and the last page should be the back cover (see below).
Example for an 8 Page Document:
- In the image below, Page 1 is the Front Cover
- The Inside Front Cover is Page 2
- The last page is the Back Cover, Page 8.

PrintingCenterUSA’s prepress department will personally arrange the single pages from your PDF onto front and back sheets. For this reason, we do not accept spreads.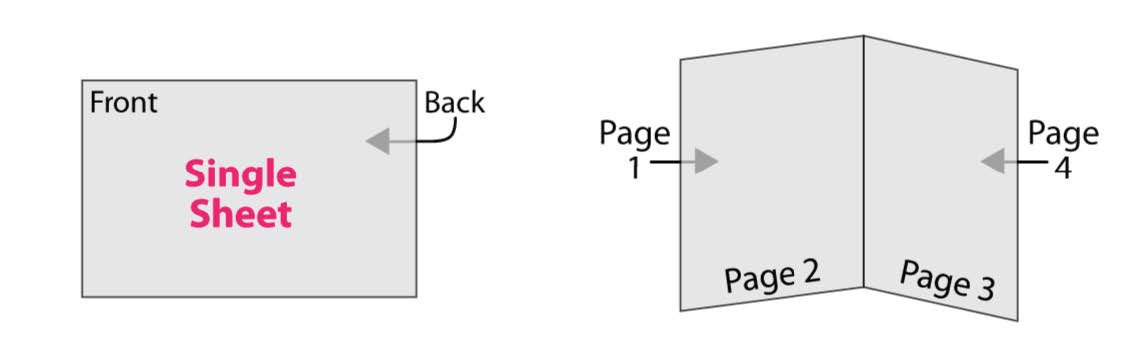
Size
To ensure price quote and design accuracy, it is crucial that the size of the order matches the size of the PDF. The PDF (saved with bleed) should be .25 inches larger for both the length and width than your desired product size. For example, if you are ordering an 8.5” x 11” booklet, the dimensions of your PDF document (saved with bleed) should be 8.75” x 11.25”. For more information on size, click here.
Booklets, Books, Magazines, Catalogs, Booklet Brochures, Programs, and other Multi-Page Products: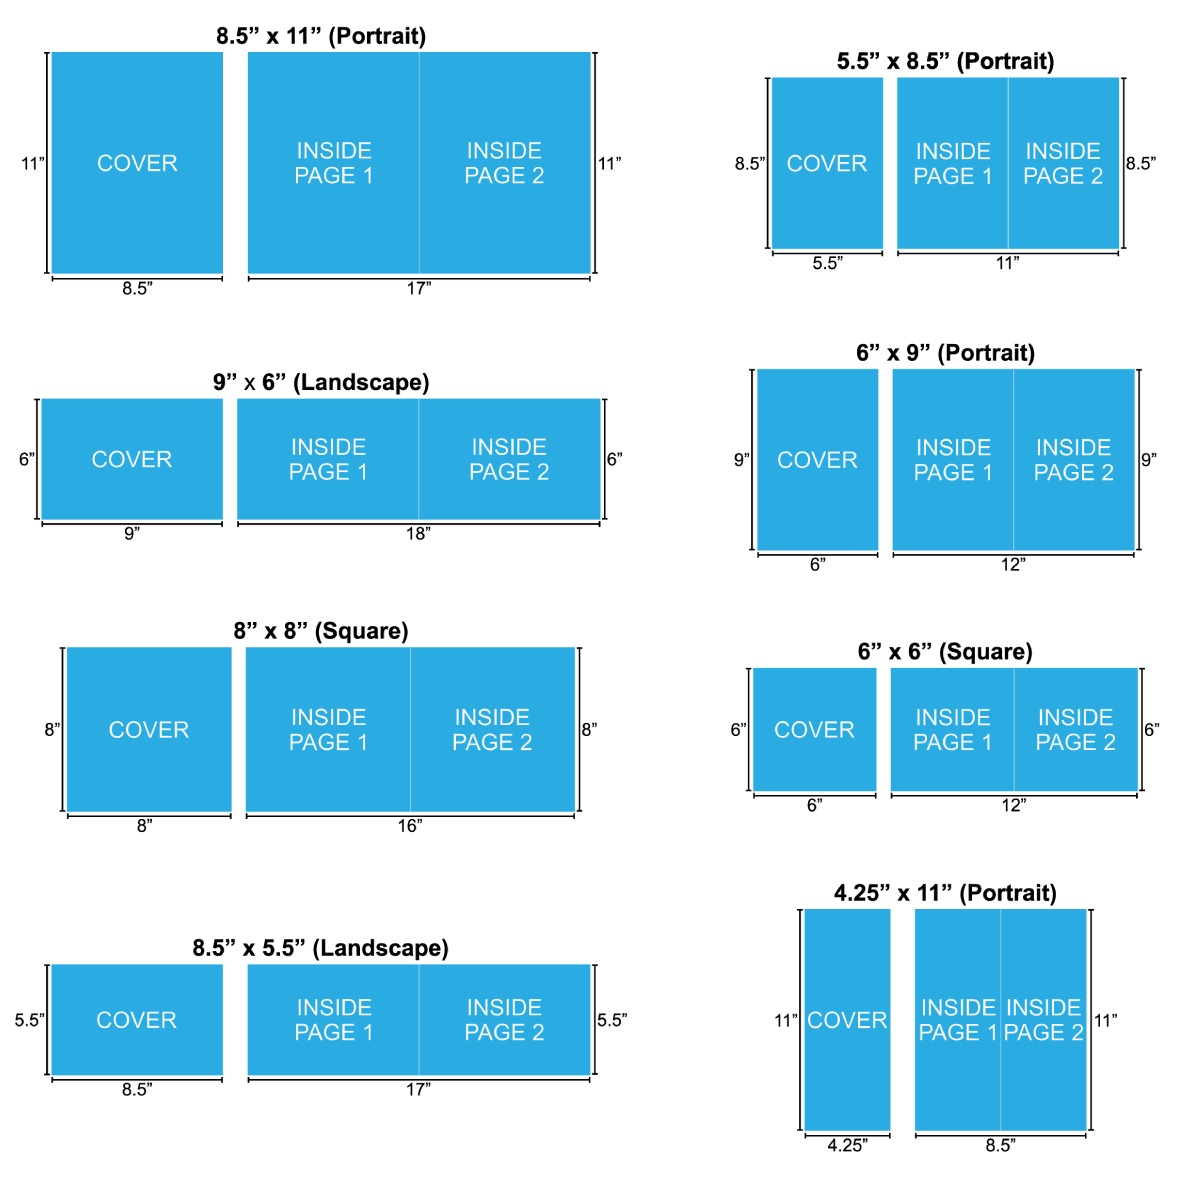
Calendars: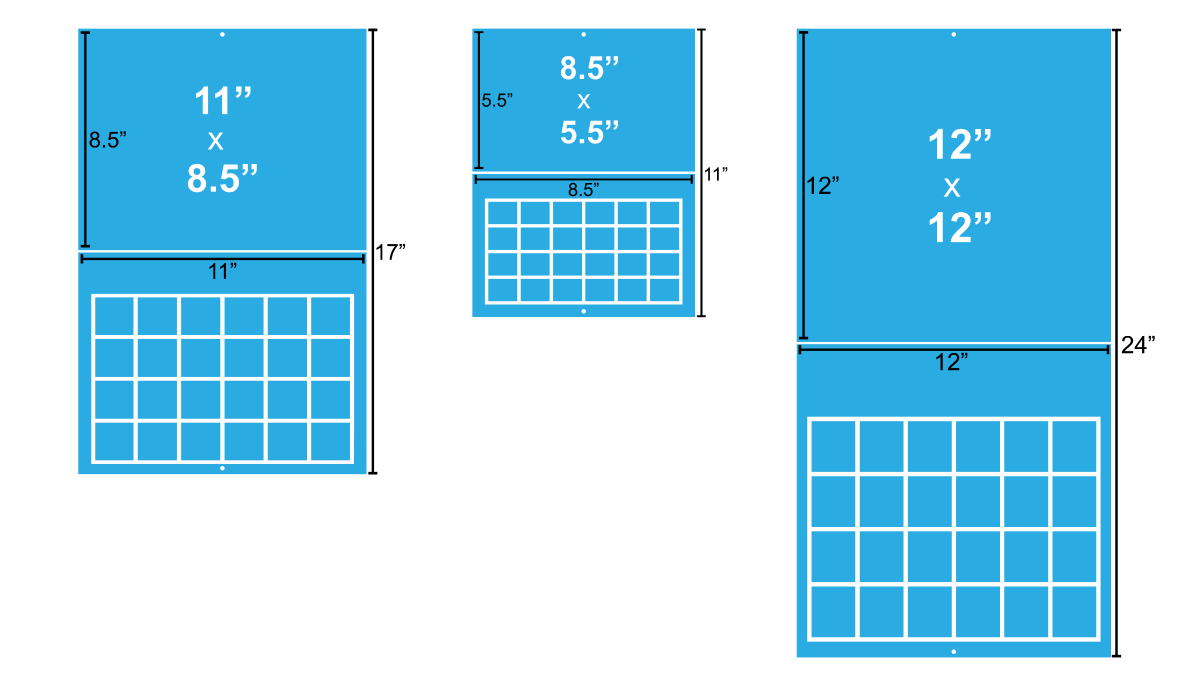
Greeting Cards: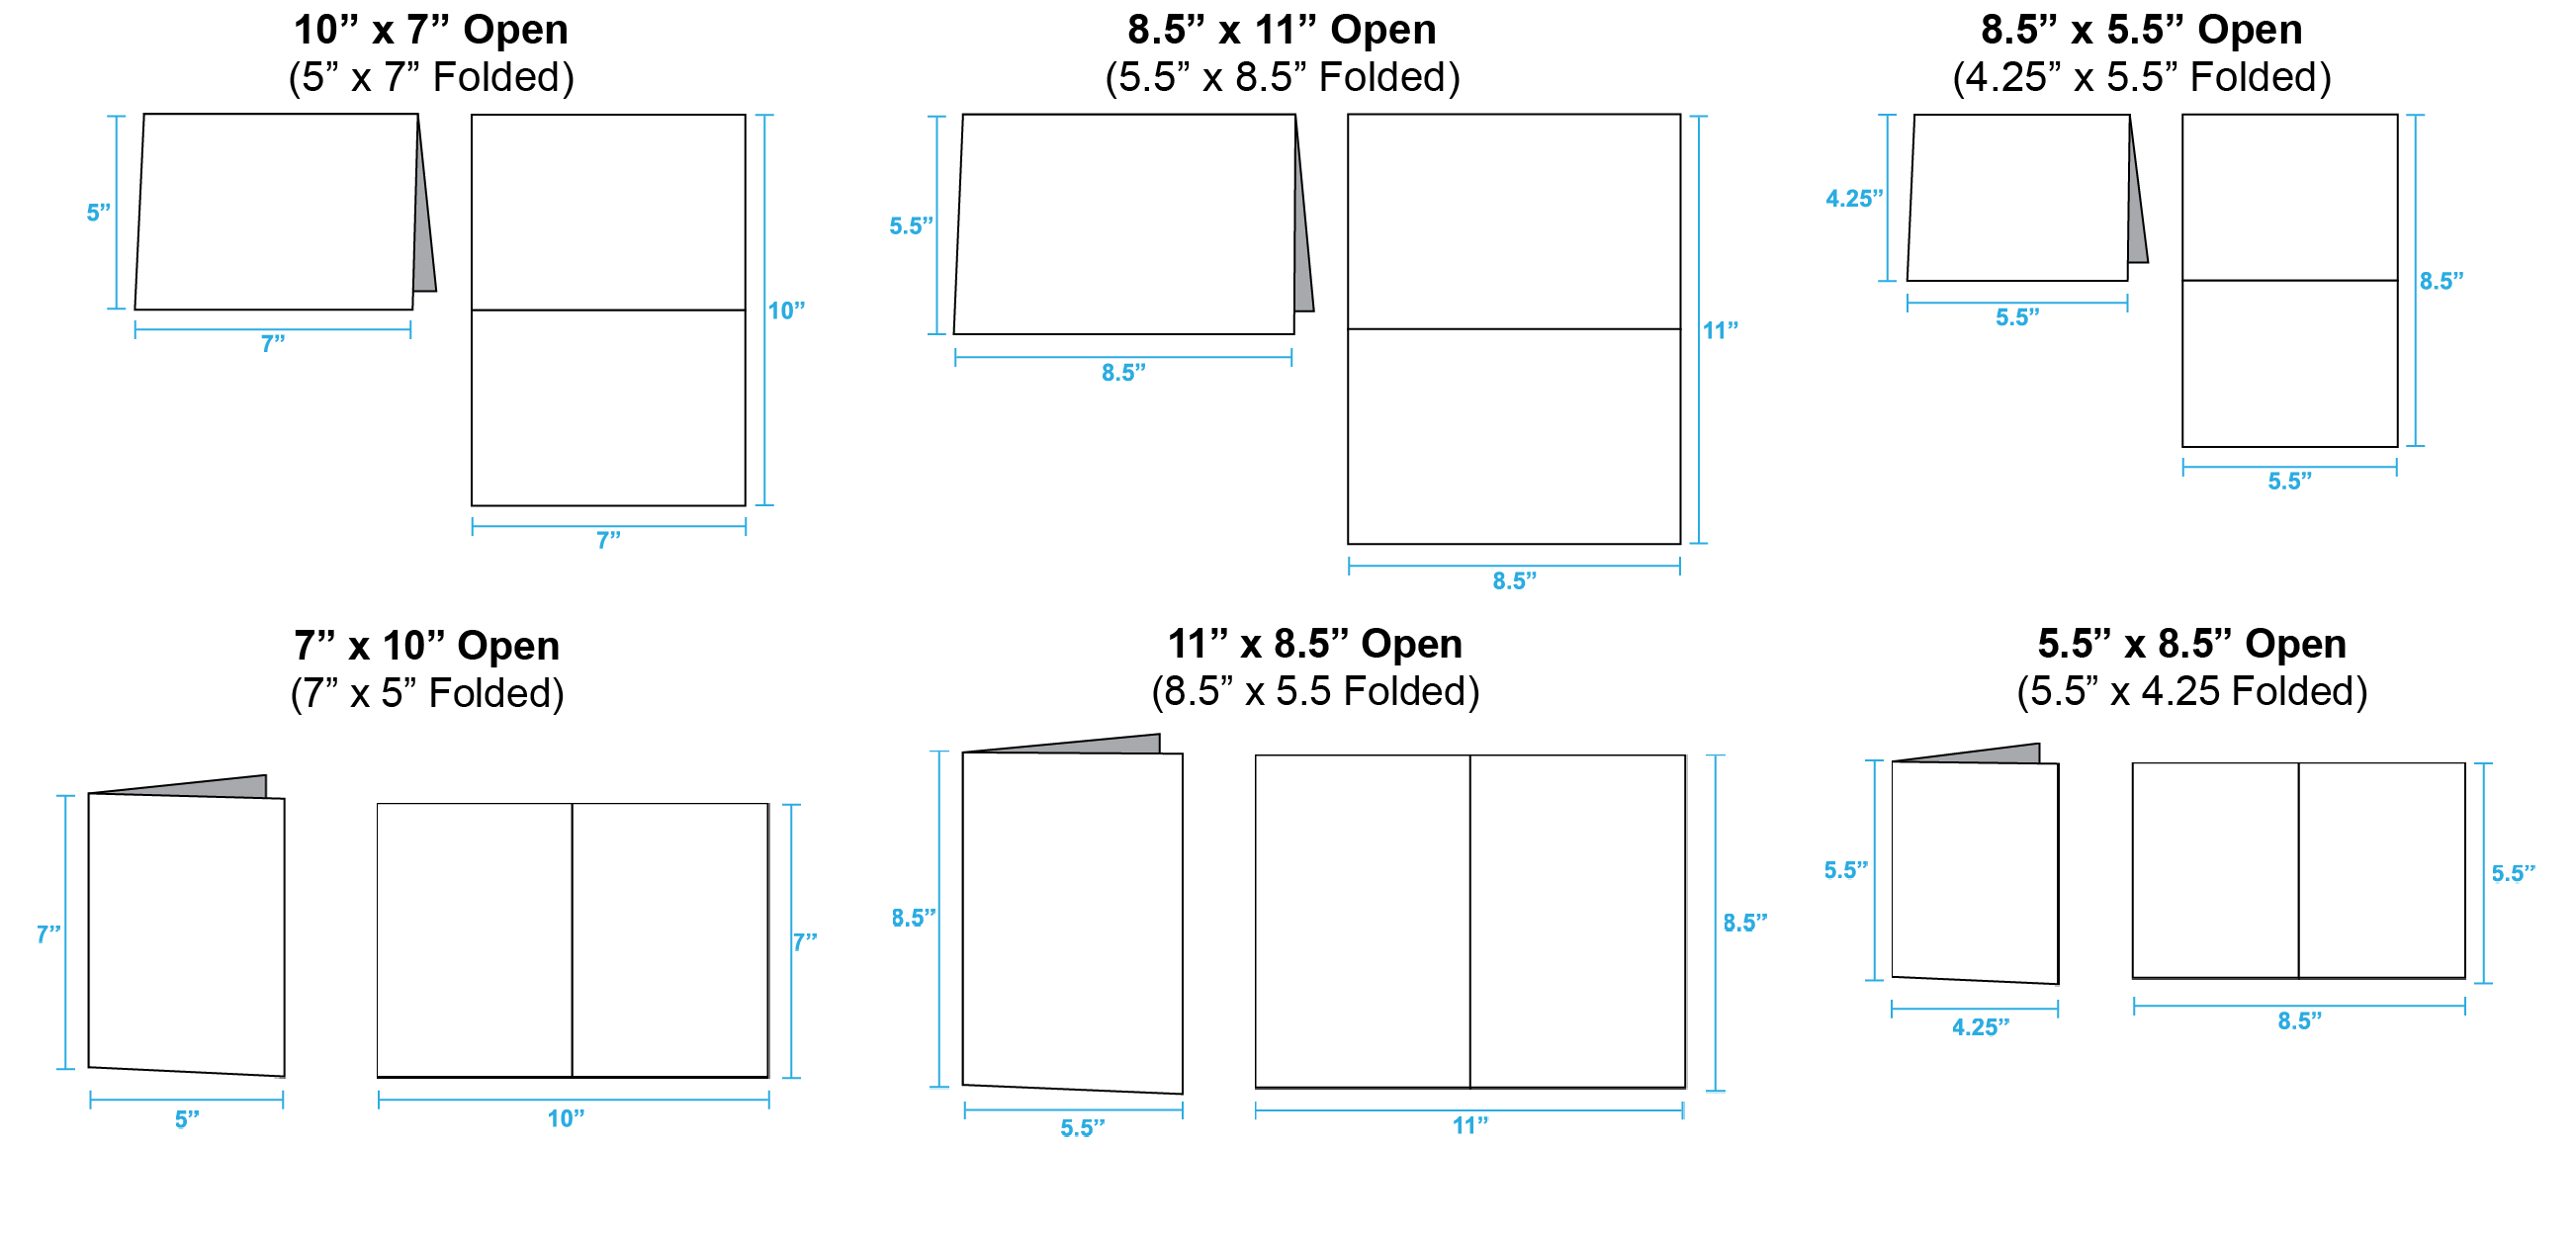
Brochures and Flyers: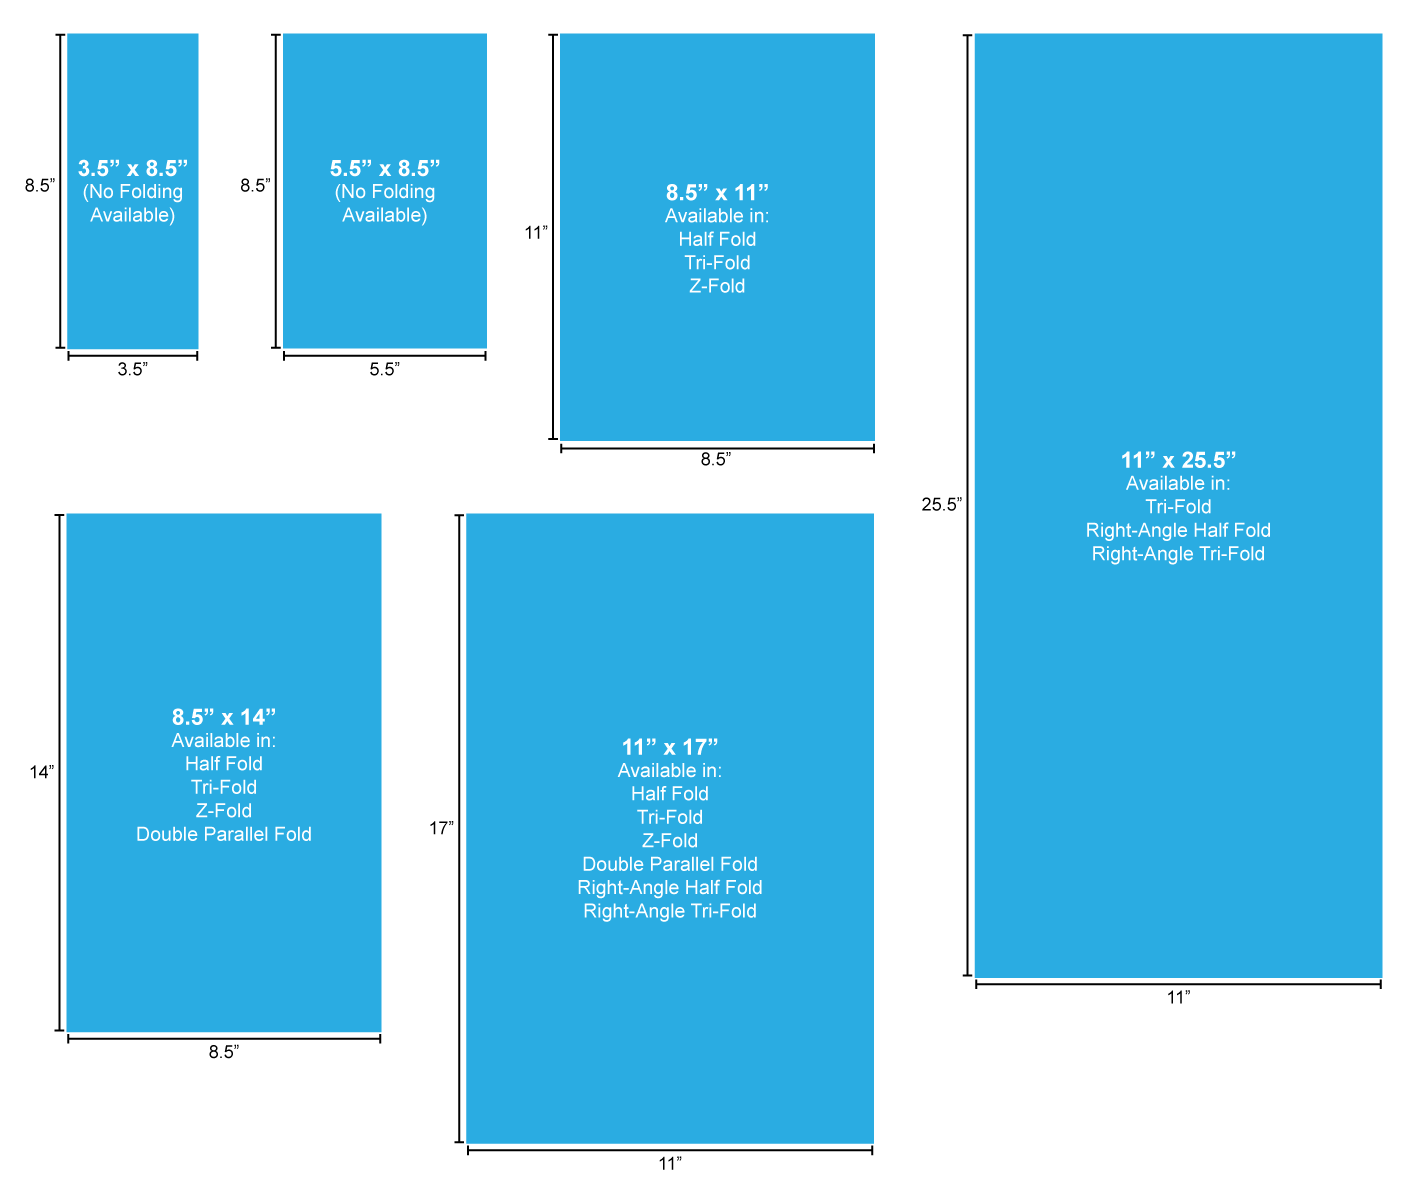
Color Quality
Every product should be designed in the CMYK color mode whenever possible. CMYK stands for Cyan, Magenta, Yellow and Key (Black). If the product is not saved in CMYK, PrintingCenterUSA will automatically convert the design from RGB (red, green and blue; this is what you see on your monitor) to CMYK. For more information about setting up your document in CMYK, click here.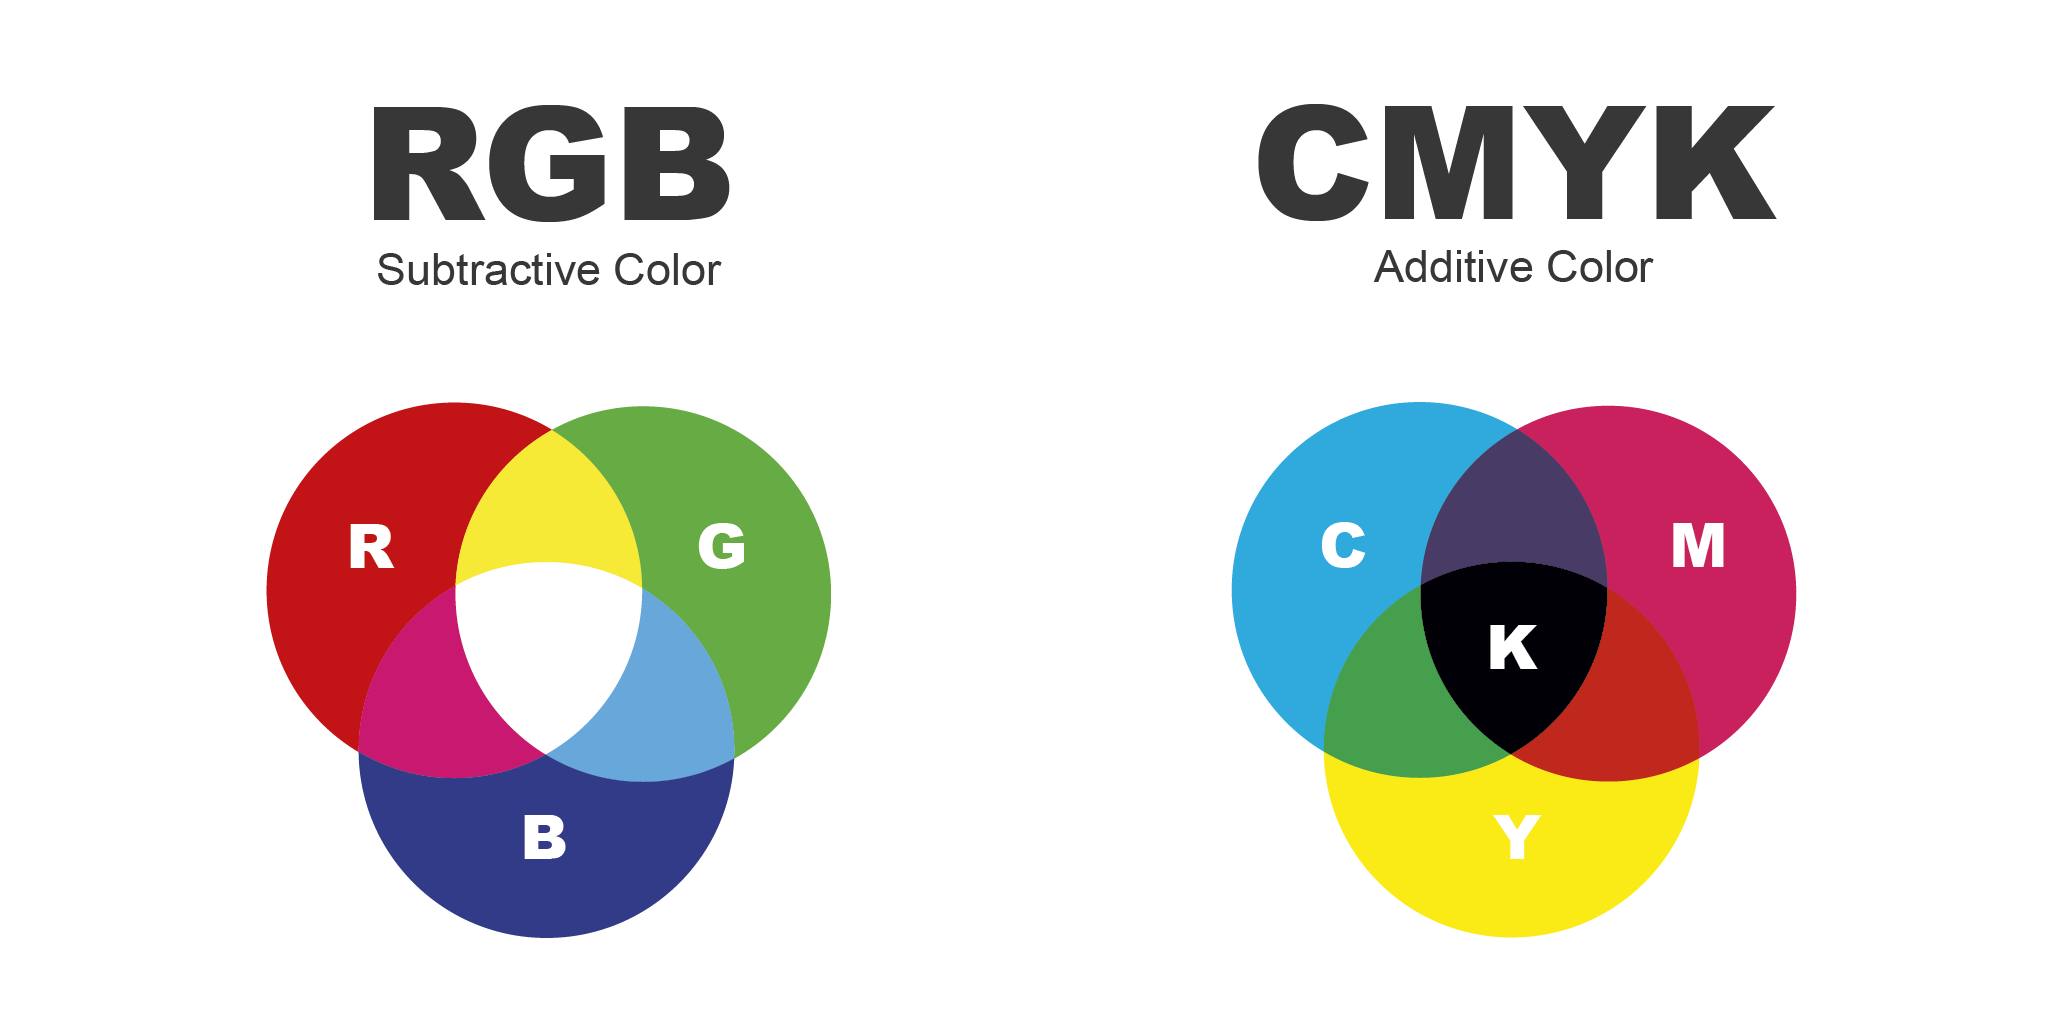
When ordering on PrintingCenterUSA’s Pricing Tool, you will be asked to select ink options (inside ink and cover ink for multi-page products). These options will appear as:
4/4 Full Color Both Sides
4/1 Full Color Front / Black Back
4/0 Full Color Front / Empty Back or
1/1 Black Front / Black Back
For example, a Postcard may have a Full Color Front (4) with only Black (1) on the back. The appropriate ink selection for this postcard would be 4/1 Full Color Front / Black Back.
Color Printing is also known as 4-color printing, full color printing, process printing, and CMYK printing. Color involves the separation of all colors into 4 different color values (Cyan, Magenta, Yellow and Black).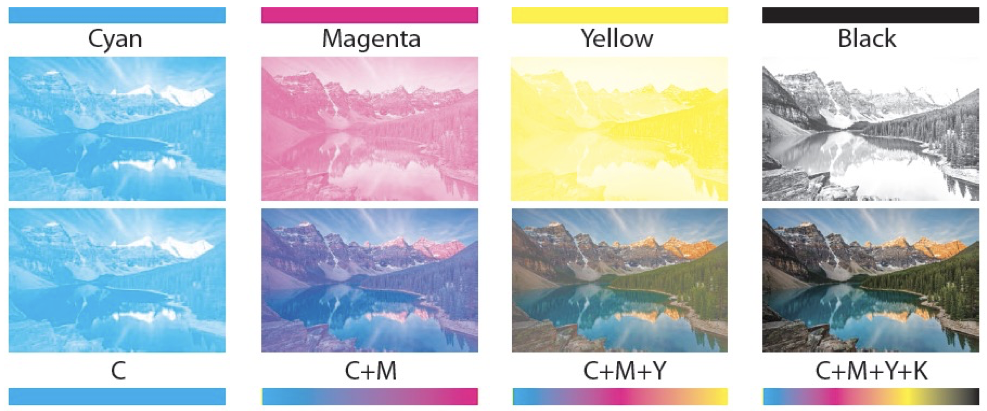
File Saving
PrintingCenterUSA requires that you submit your art as a Print-Ready PDF. Click here to download and install our PrintingCenterUSA PDF Preset (for Adobe programs only). You will be downloading a .zip folder. Double click the file to unzip the folder.
Select your program for a step by step tutorial on how to load our preset and/or save as a PDF: InDesign, Illustrator, Photoshop, Canva, Publisher, and Word.
Note: Do not reduce the size of your PDFs. Big file sizes are OK. We need the highest resolution to ensure that your files get printed with the best quality.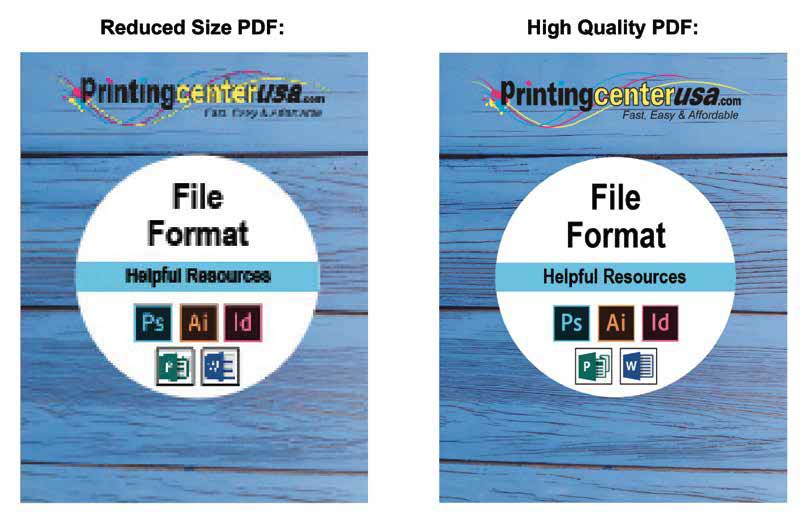
Folds, Creases, Die Cutting
PrintingCenterUSA provides free downloadable templates for our products. To ensure you appropriately plan for folds, creases, and die cutting, it is best that you utilize this resource.
Our folding products are professionally creased, making an even fold that doesn’t crack the ink at the edges.
Greeting Card Folds (Landscape & Portrait):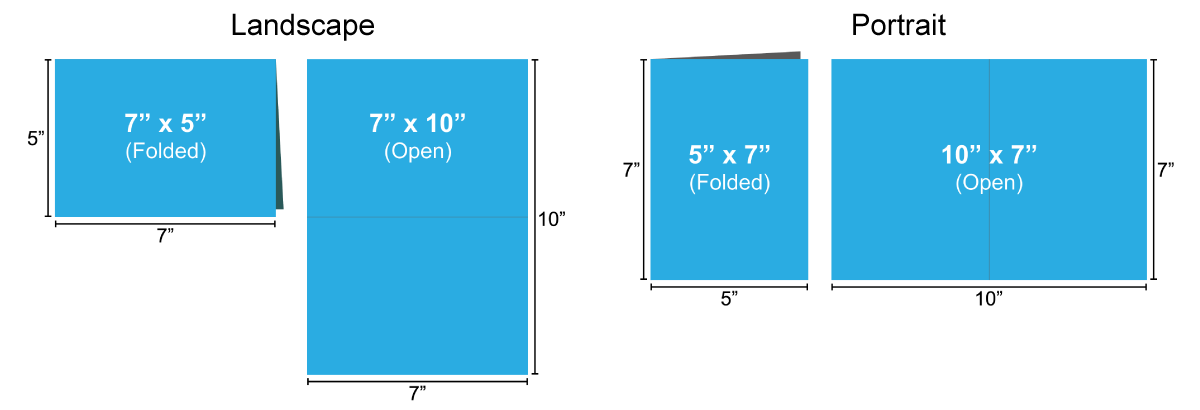
Brochure Folds: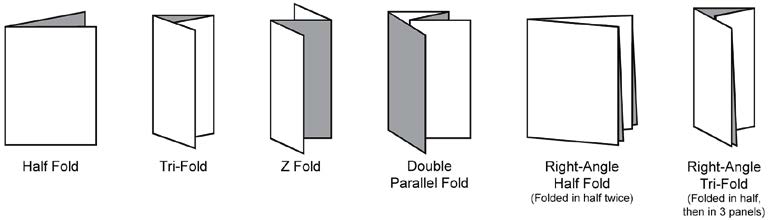
Die Cut Products: PrintingCenterUSA offers Rip Cards and Rip Door Hangers, which are a perforated die cut. We also offer die cut Presentation Folders and Envelopes. Click your product for free downloadable templates that include the fold lines and die cut lines for reference during design.
For a step-by-step tutorial on Print-Ready File Creation, select from one of the following programs: InDesign, Illustrator, Photoshop, Canva, Publisher, and Word.
Have more questions? Check our Print-Ready File Creation FAQ.